 With a few more weeks of summer, I wanted to do one last hack while I could still get away with a tank dress. I also feel like a tank dress is the perfect item to layer with a jean jacket once the weather starts to turn. This time I wanted to sew up a straight skirt version of the Zoey dress. I sewed up two samples (one in black rib knit and one with brown rib knit. It was a good exercise in how fabric choice makes a huge difference in fit. The black rib knit was softer and had less recovery so the straps grew (I ended up taking about an inch off of them) and the fit is overall looser. The brown rib knit was more stable and had more stretch recovery so it has a closer fit and needed no adjustments to the straps.
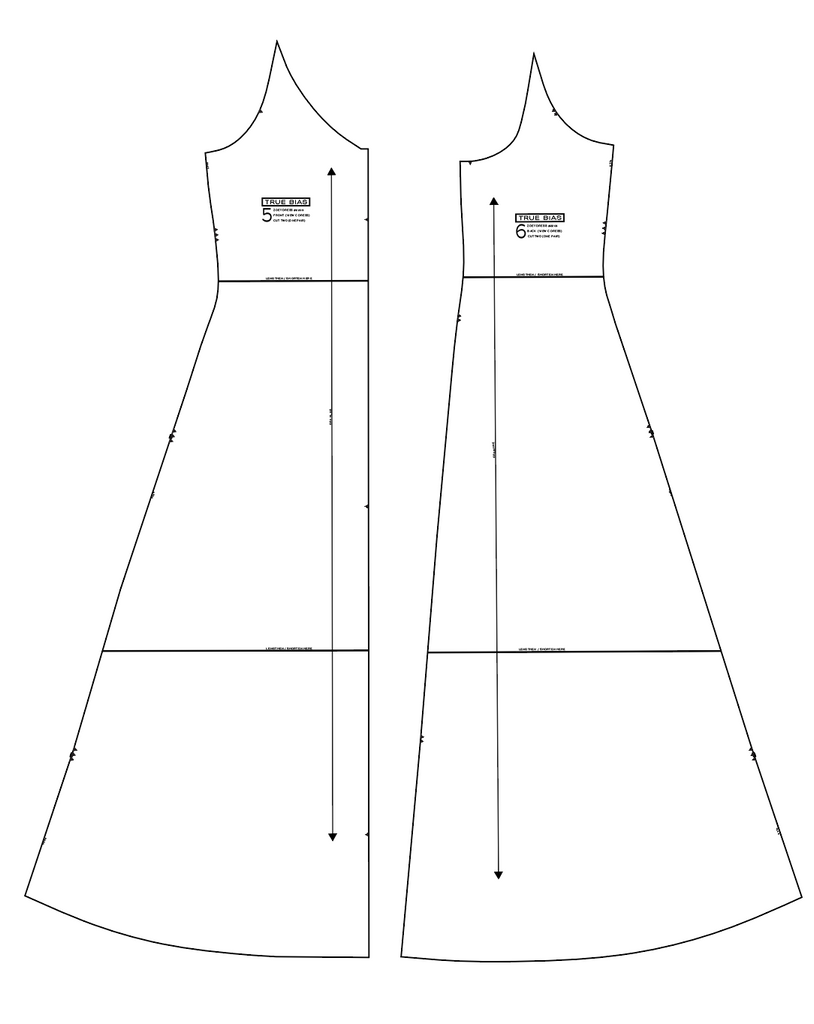
The hack overall is pretty simple. There are no edits made to the top portion of the dress which include the straps and bindings. So we will only be making edits to the front and back dress pattern pieces. I will be showing my edits with red lines.

Let's start with the Front dress pattern piece. Because the original dress has a seam down the front, I decided to take that out and have it cut on the fold. To do this I removed 3/8" (the seam allowance) from the center front.

I also wanted to add a bit more ease to the waist of the pattern. This was personal preference, but with the skirt being more fitted I wanted to have more room in waist so I didn't feel like it was bodycon. I was looking for for a straight fit. So I added about 1/2" to the waist area (I figured I could always take it out later if I wanted).

Lastly is the side seam and hem. The hip hits around the triple notches on the side (depending on your height it may be a bit different) so I used that as my curve point to go straight down from. I just freehanded this.
Once I reached the bottom I redrew the hem to be straight.

Now for the back piece. The first thing I did was transfer the side seam and hem of the front to match the side seam of the back (I just traced it).

Now for center back. This is a bit trickier. I decided to leave the center back seam because I wanted to keep the swayback curve at the lower back. So, I estimated where the curve of the butt would be (which is about the same area as the hip curve, maybe a bit lower, and went straight down from there. This is a great area to get a personal fit if you generally do a full or flat seat adjustment. Once again, I would go wider if you unsure as you can always take it in more later if needed.

And that is it!
A couple of tips.
- First, make sure to cut your front on the fold at this point. You may want to change the grainline marker on the pattern piece to indicate this so you don't forget.
- Be extra careful not to get your side seam and center back mixed up when sewing. They look very similar now so be sure to add notches as necessary so you keep it all straight.
- I find it very helpful to back the side and back seams first. After trying the dress on I was able to make a few tweaks for a better fit before serging.
OK, I hope you give this a try and love it.
Here are my finished straight skirt Zoeys. I think they will get lots of wear.


