Step 55 - Without trimming, finish one long raw edge of your Belt Loop by either serging or zigzag stitching.

Fold in the unfinished edge by 3/8”, wrong sides touching, and press.

Fold in the finished edge by 1/4”, wrong sides touching. Press.

Topstitch 1/16” along each edge.

Step 56 - Cut Belt Loop into five 3 1/2” sections.

Fold in ends, wrong sides touching, by 1/2” and press. 
Step 57 - Place the belt loops in the following places (I find that using a glue stick is the easiest way to temporary hold them in place. A pin is really hard to get thru this many layers of denim):
0-18 Size Range -
Front - Inside pocket opening by 1” (sizes 0 - 12) or 2” (sizes 14 - 18). The top stitchline should line up with the Waistband topstitching and the bottom will extend into the bottom Front by about 3/4”.
Back - All three belt loops should extend into the bottom Back by about 3/4”. Place one at center back and the other two inside the sideseams by 2” (sizes 0 - 12) or 3” (sizes 14 - 18).
14-32 Size Range -
Front - Inside pocket opening by 2” (sizes 14 - 20) or 3” (sizes 22 - 32). The top stitchline should line up with the Waistband topstitching and the bottom will extend into the bottom Front by about 3/4”.
Back - All three belt loops should extend into the bottom Back by about 3/4”. Place one at center back and the other two inside the sideseams by 3” (sizes 14 - 20) or 4” (sizes 22 - 32).


Attach belt loops using a straight stitch, stitching forward and backward a few times to secure.


Step 58 - Line the Front Hip Facing and Back Hip Placket up on top of one another. Pull them away from the garment and do a small line of stitching connecting the two along the bottom edges.


Step 59 - Stitch and open buttonholes at markings on Front Bib and Front Pocket. It's always a good idea to practice your buttonholes first. Once stitched I like to use fray check to help stabilize the buttonholes.


With the Front lined up with the Back, mark button placement through open buttonholes. Be sure to mark them along the outside edge of buttonhole and not in the middle.


Step 60 - Mark placement for buttons on the Bib 1/2” down from the top and 3/4” in from the outside edge.

Attach two buttons to Bib and two buttons to each Back Hip Placket. I use an awl to punch a hole first.

Then I add the back of the Jeans button thru the hole.


Lastly I hammer the jean buttons on using a hammer and a hard surface like an anvil.

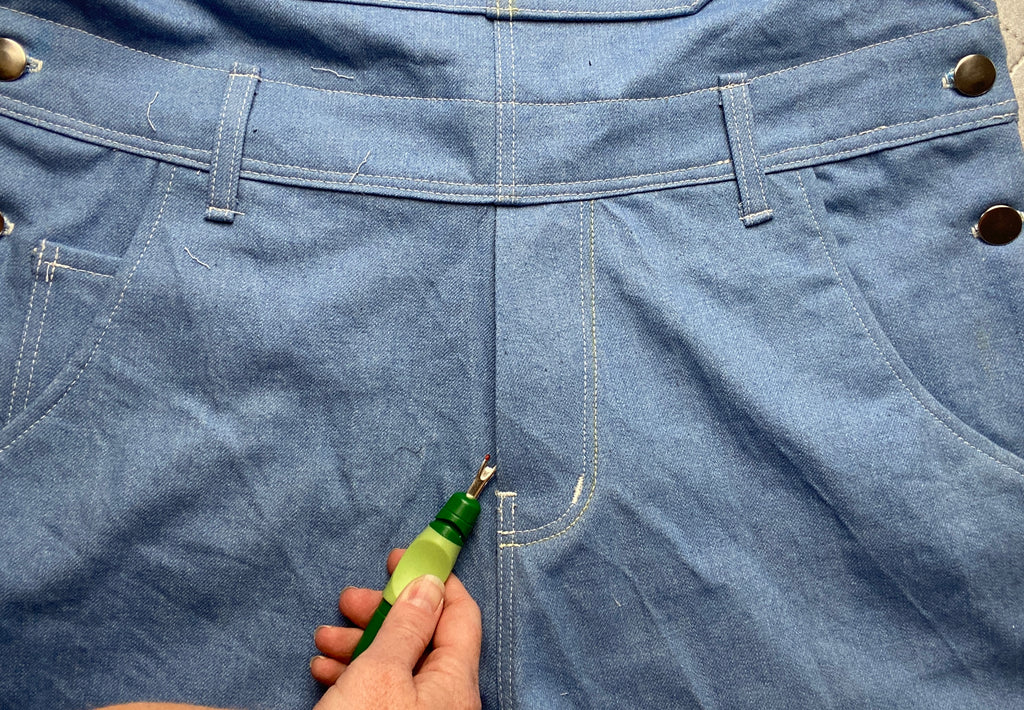
 Step 61 - Using a seam ripper, carefully remove the basting stitches on the fly above the dot marking and below the Bib.
 Step 62 - To attach overall buckles, start with the Strap facing up.
Insert the end of the Strap through the slider bar, weaving the Strap under the first bar, over the center bar, and back under the other side, as pictured.
Next, insert the Strap through the buckle bar, face up.

Pull the slider bar and buckle up the length of the Strap to create some slack for the next step.
Insert the end of the Strap through the back side of the slider bar, weaving the end over the center bar. Your Strap should now resemble a loop, as pictured below. 
Turn in the end of the strap by 1/4” and pin to the underside of the looped strap, 1” past the center bar, as pictured.


Carefully keeping the rest of Strap out of the way, stitch the end of the Strap in place close to the folded edge, backstitching at both ends to secure. 


Step 63 - The style of these overalls assumes you will be rolling the hem twice. If you do not intend to roll them, you may want to shorten them by about 2”. Now is a good time to try on your overalls and adjust the length as needed.
To hem, fold the bottom raw edge up by 1/4,” wrong sides touching. Press.

Fold up again by 1”. Press. Stitch hem at a scant 1”.
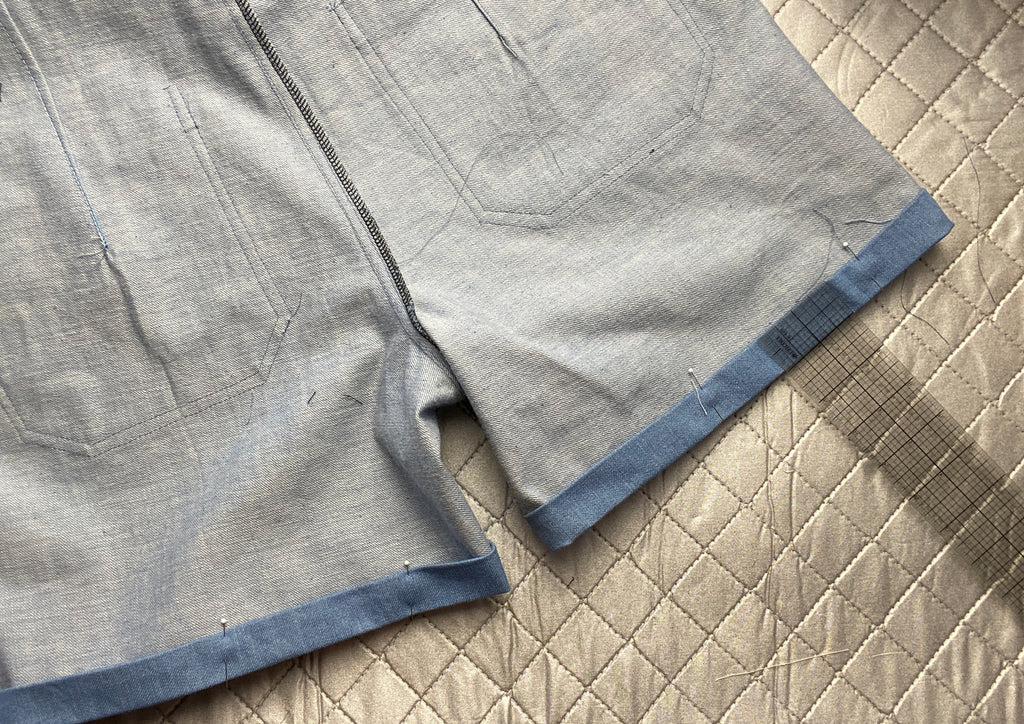

Roll bottom edge up twice on its hem. Press and steam well.
 Congrats! You are finished.