Step 44 - With the Back (pants) facing up and the Front falling down and out of the way, pin the bottom of the Back Straps to the top of the Back, right sides touching. Match up center back topstitching and the outer notches on the Back Straps to the darts on the Back (pants).

Stitch. Without trimming, finish seam allowances in your desired manner.

Step 45 - Press seam allowances up toward Straps. Topstitch above the horizontal seamline at 1/16” and then again 1/4” above the first.


Step 45 - Finish side seam allowances including Back and Strap sides. Be sure not to trim the seam allowances when doing so.
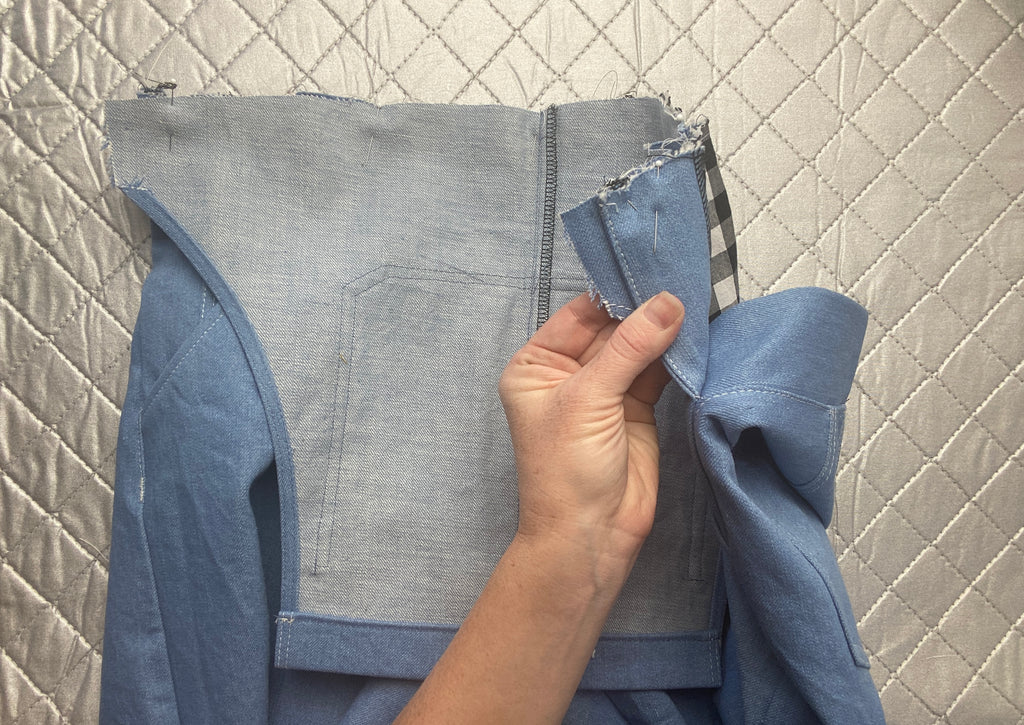
 Step 46 - Pin Front to Back, right sides touching, along side seams. Match notches and keep the Front Hip Facing extended.

Note that the Front will be shorter than the back (extending 1/2” past the Back/Strap seamline).

Stitch from the hem up to the notch (or 2.25” past the bottom of the Front Hip Facing) and backstitch.
When stitching past the Hip Facing, the stitchline will be directly on top of the stitchline connecting the Facing to the Front. As a result, you may find it easiest to stitch this seam with the Front on top.


Step 47 - Make a small clip in the Front seam allowance just below the Front Hip Facing. This will allow the Facing to stay pressed toward the front.


Press all other seam allowances, including the unsewn side seam of the Back Straps, toward the back.
 Step 48 - Fold each of the Back Hip Plackets in half, lengthwise, right sides touching. Pin.

Stitch along top and bottom edges. Trim corners and seam allowances to reduce bulk.
 Step 49 - Turn right side out. Press. Finish seam allowance of open edges together by either serging or zigzag stitching.
Step 50 - Line one Back Hip Placket up with the top edge of the Back Straps and the finished edge extending just past the side seam allowances on the left side of the garment. Pin along back edge.


Baste in place and remove pins. I find it easiest to baste this from the wrong side here, not worrying about being precise. This will make it much easier to get a nice topstitching line from the right side in the next step.

On the right side of the garment, topstitch along the Back side seam from the top edge down to the bottom of the Pocket Bag, backstitching at both ends. Do a small bar tack at the bottom. Remove visible basting stitches.


This topstitching will keep the seam allowances toward the back and also attach the Back Hip Placket to the Back side seam.
Repeat this step with the second Back Hip Placket and right side of your overalls.
Step 51 - Pin the bottom of the Front Bib to the top of the Front (pants), right sides touching.
The ends of the Bib will extend past the ends of the Front by 1/2” on each side.

Baste at 3/8” seam allowance.

Step 52 - Fold the top edge of the Front Waistband Facing down, wrong sides touching, by 1/2”. Press.

With the wrong side of your Front (pants) touching the right side of your Waistband, pin the bottom of the Waistband to the top of your Front. The Waist- band will extend past the edges of the Front by 1/2”.

The Front (pants) is now sandwiched between the Waistband Facing and the Front Bib. Stitch. Trim/grade seam allowances as needed to reduce bulk. 

Step 53 - Pulling the Front (pants) slightly to the inside to keep it out of the way, pin the side edges of the Front Bib to the Front Waistband Facing, right sides touching. Make sure the folded upper edge of the Waistband is still turned in.

Stitch at a 1/2” seam allowance so that the stitchline lines up with the edge of the Front (pants).

The top edge of the Waistband Facing and edge of the Bib should also align at the stitching as shown below.

Trim corners and seam allowances to reduce bulk.

Step 54 - Turn the Waistband right side out. Press. Pin along the top edge.

Edgestitch just inside the Bib, 1/16” from the seam where the Bib meets the Front (pants), backstitching at both ends. Do another line of stitching like the first, 1/4” above the first.

Do a last line of stitching just inside of the Waistband’s upper folded edge. If you are using topstitching thread like me, you are going to need to do this from the the right side of the fabric which can be a bit tricky. I use a line of pins to mark the inside folded edge so that I know where to stitch. You could also mark it with a temporary marking tool.


And that is it for today! Come back tomorrow and we will finish up our Riley overalls.