


Today I am going to show you how I hacked the Marlo pattern to have a side slit. I will be sewing up View B (the longer view) of the pattern. I also decided to make it even more oversized for that really boxy look so I went up two sizes for this hack, but I think that is optional.
Pattern Changes
Start by printing off your pattern. We will be making a few changes to the bands of the pattern first.
I wanted to make it more boxy overall so I took the negative ease out of the wristbands. To do this I simply made the width of the wristband the same as the bottom of the sleeve.


For the Waistband I needed to split it first into a Front and Back (instead of one long waistband for both).

The notch indicated the sideseam so I split it there. Next I took the Back portion of the waistband and made it the same width as the bottom of the back to take out the negative ease.

Then I did the same thing for the Front portion of the Waistband.


That is it for the bands. Now to move on to the side slit. First you need to decide how high you want the slit to be. I decided that mine would end 4" down from the bottom of the armhole. Put a notch on the front and back side where you want the height of the slit to end.

Now that we know how high the slit will be, we can create our facing. My facing is 1 3/8" wide and the height is 1 3/8" higher than the slit notch. You may want to my your slit facing wider or narrower. That is up to you.
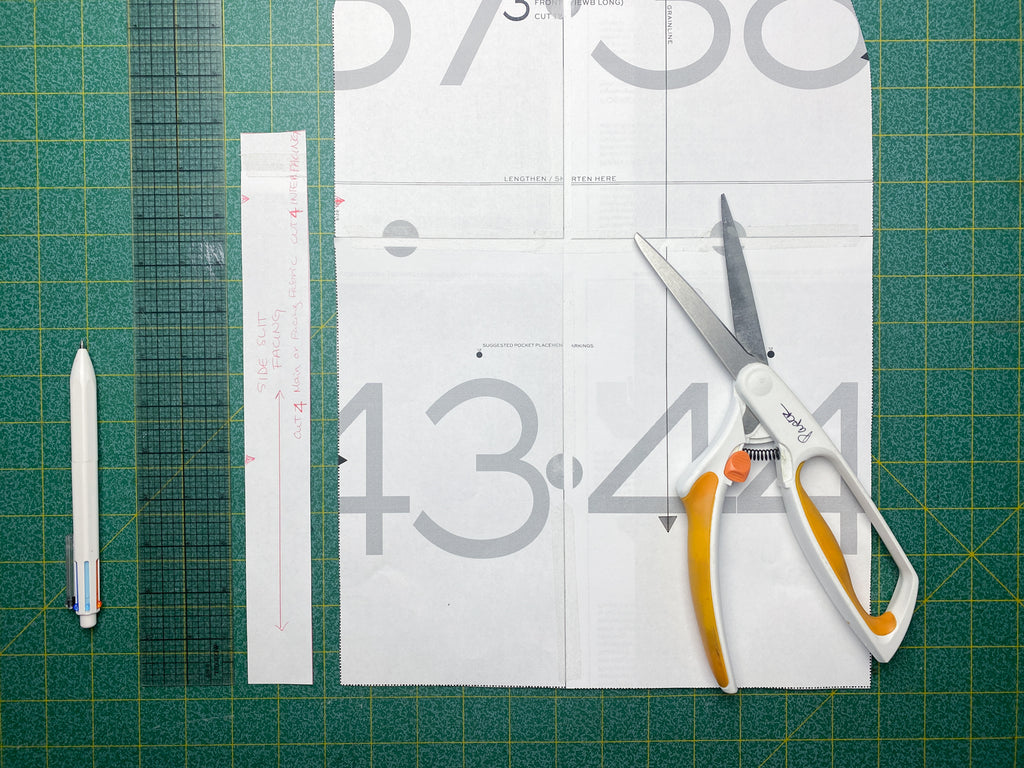
Now that you've created your adjustments it's time to cut out your fabric. All pattern pieces will be cut out like the original pattern instructs except there will now be a Back Waistband (cut 1 on fold), a Front Waistband (cut 2), and a Slit Facing (cut 4 fabric and cut 4 fusible interfacing).
I decided to use a black cotton lawn for my facing fabric. Depending on the fabric you are using for your Marlo, you may be able to use the same fabric for the facing. I wanted mine to be extra crisp and my sweater fabric is a bit loose.
Sew the Facings
You will start sewing your Marlo according to the original Marlo instructions through step 12.
At this point the pockets will be done, the shoulder seams are sewn, and the sleeves are attached. Next we add the Slit facings.
Each Slit Facing should have the fusible interfacing attached. Fold in the outside long edge and top edge by 1/4" and press. Make sure you end up with two pairs.
 Pin a Facing, right sides touching, to a coordinating side seam.

Stitch from top to bottom at 3/8".

Press facing away from the main sweater and over the seam allowances. Understitch close to the seam, into the facing.
 Repeat for other 3 sides / Facings.
With right sides touching, line up a front with it's coordinating back with the facings on top of one another. Pin.

Stitch from the wrist to the notch marking the top of the slit and backstitch. For about an inch you will be stitching right on top of the stitching attaching the facing to the main sweater.


Press the Facing to the inside. Pin.

Edgestitch around the Facing. You can do this on your machine like me, or handstitch for a cleaner finish.

Sew the Bands
With the side slit done, it's time to add the bands. You attach them in basically the same way as the instructions tell you, except you need to finish the sides since it's not split.
I am starting with the Back / Back Band. Pin one edge of the band to the bottom of the back, right sides touching.
The Band will extend 3/8" past each Side Slit edge. Stitch.

 Press the seam allowances down towards the Band. Press the bottom edge of the band in by 1/4".
 Fold the bottom edge of the band back up towards the seam, right side touching, so the folded edge slightly extends past the seam line. Pin. Stitch at 3/8" so the new stitchline lines up with the side of the slit.

 Trim corners to reduce bulk. Turn band right side out and pin the folded edge so it slightly covers the seam where the Band meets the Back.

Stitch in the ditch from the right side (or hand stitch for a cleaner finish) catching the folded edge on the underside as you sew.

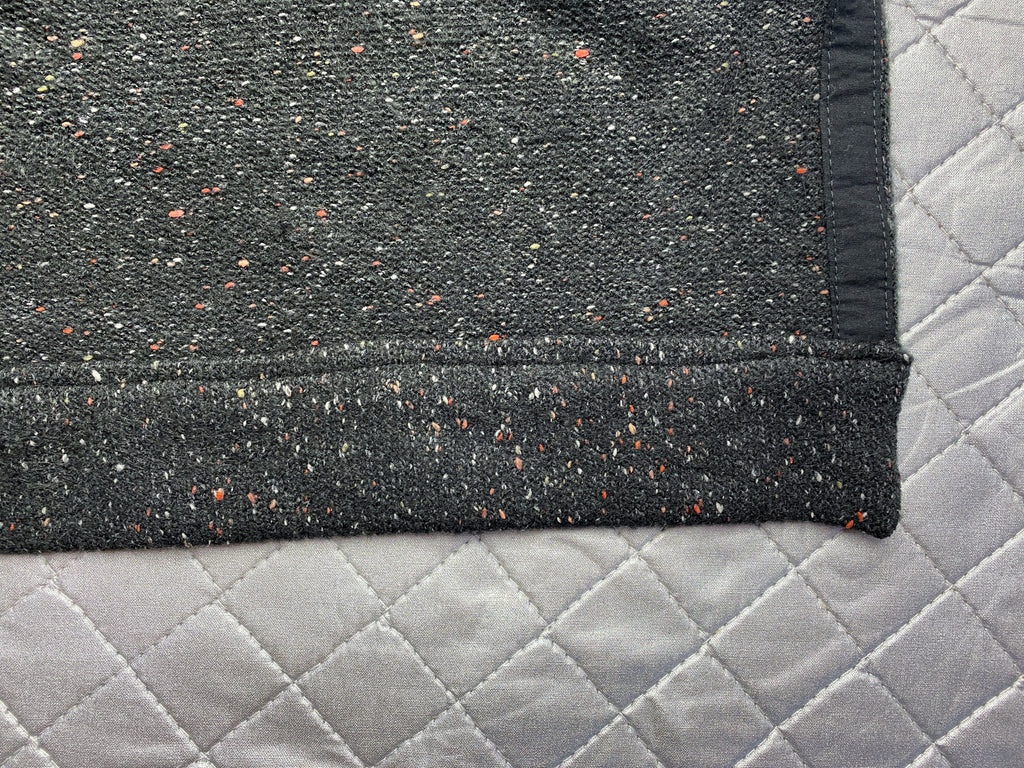
That is it for attaching the Back Band. The Front Bands are almost exactly the same. The only difference is that the band extends 3/8" past the side slit on the Front, but is flush with the Front center edge.


The last band that you need to sew on is the Wristbands. These are attached exactly like the instructions tell you, except they do not have any negative ease so you do not need to stretch them to fit.

Finish the Marlo
The rest of your Marlo, including the Neckband, buttons and buttonholes, is sewn up with no changes. Follow the instructions from the original pattern and you will be finished.
If you want to purchase the Marlo pattern you can do so here.


