Step 11 - Grab your Back Strap pieces. With the right sides facing up, trim the left Strap only along the pattern piece trim line as shown below. The left strap will be a bit skinnier than the right strap, allowing the left strap to overlap it in the following steps.

On each of the long curved sides, fold and press in by 1/4", wrong sides touching. Fold and press in again by 3/8", wrong sides touching. Pin. Use lots of steam for the curved edges.


Step 12 - Create two rows of stitching along each folded edge to secure. The first one is 1/16” in from the outside folded edge and the second is 1/4” in from the first. If using topstitching thread these need to be sewn on the right side of the fabric. If not, you may find that the second row is easier to sew and catch the folded edge by sewing from the wrong side.

Step 13 - Place the left Strap (when wearing) over the right, as shown below. Match up dots and center back notches. Pin. Note that because the left Strap is narrower, the right strap will extend further past center back on the underside. The center back notch for the left strap should be right on the fold. While the center back notch on the right strap is about 3/4" in from the folded edge.


Step 14 - Draw in lines with a marking tool to finish out diamond-shaped topstitching as shown below.

Starting at the bottom of your Straps, stitch up to the dot and pivot at corners to stitch the outside diamond/topstitching (stitching on top of previous stitching when necessary). Repeat for inside diamond/topstitching.

Step 15 - We are going to finish out the Rear Pockets in the same way that we did the Chest Pocket. With wrong sides touching, fold the upper edge of each Rear Patch Pocket down by 1/4" and press. With right sides touching, fold back the upper edge of the Pockets at the notches (1”). Pin.
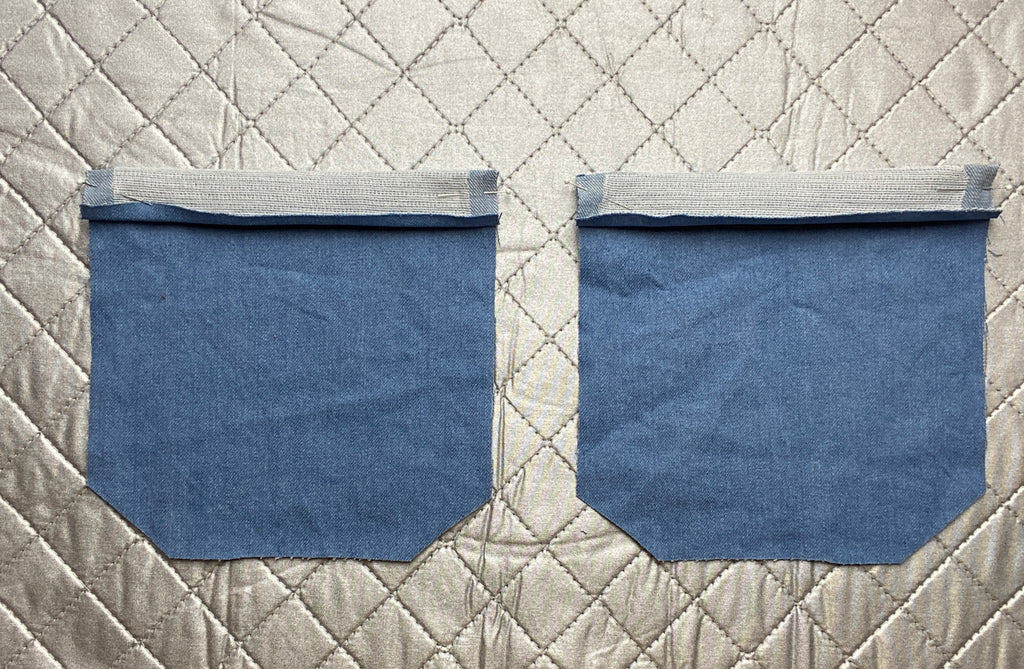
Stitch the side and bottom edges of each Pocket at 1/2” seam allowance, starting at the upper folded edge and pivoting around each corner. Trim upper corners to reduce bulk.

Step 16 - Turn the upper corners of each Rear Patch Pocket right side out. Press carefully to create sharp right angles.

To secure, stitch close to the lower folded edge, backstitching at the ends. Press in the bottom and side edges by 1/2” (wrong sides touching) using the line of stitching as a guide. If using topstitching thread do this from the right side, otherwise you may find it easier to do it from the wrong side.

Step 17 - Sew back darts. Press excess toward center back.


Step 18 - Topstitch (at 1/16”) from the right side along inner edge of dart seam, backstitching at the bottom.

Step 19 - With right sides facing up, pin each Rear Patch Pocket to the Back, matching the upper corners of each Pocket to the placement dot markings. Carefully pin in place.
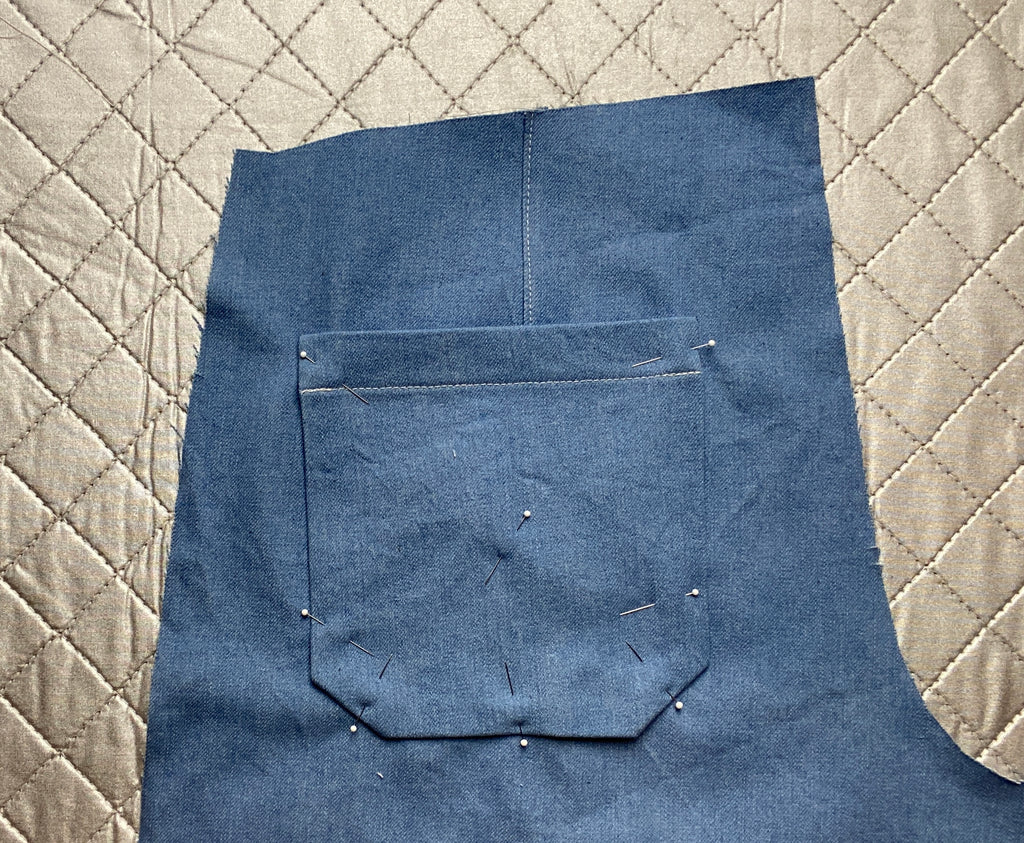
Now attach the Rear Pockets in the same way that you attached the Chest Pocket. Topstitch close to the folded edge of the side and bottom edges at 1/16”. At the bottom corners, leave your needle down, pivot and continue sewing. Reinforce upper ends by backstitching securely. Sew another row of topstitching, 1/4” inside the first, in the same way.

And that is it for today. Come back tomorrow where we start sewing the front pockets.