I sewed up a fun summer Roscoe blouse hack this week and wanted to share a step by step tutorial for those who wanted to do the same. It's an easy hack and a great way to bring the spring / fall vibe of the Roscoe into the warmer summer months.

As for sizing, the Roscoe is quite oversized so you may want to think about sizing down for this hack since it is cropped. Totally up to you, but I did size down two whole sizes for the one shown in the pictures and it worked well.

Go ahead and cut out the pattern pieces for the neck ties, neck facing, and neck binding as usual according to the original pattern. Next, cut your sleeves out, but shorten them by about 4 inches. You can always shorten them more down the road. Make sure that you are following the curve of the hemline since the outside of the arm towards the elbow needs more length than the inside. The dotted red line is the new cut line.

Next, do the same for the front and back blouse. Trim about 10 inches off of the blouse length of the Roscoe. Note that the front is curved to allow extra length for your chest, so make sure to follow the same approximate curve of the hemline for your new cut line. If you think you may want the top a bit longer (mine is quite cropped) cut off less. We can always trim off more later.

Lastly, find the front and back ruffle pieces. You are going to keep the original widths, but only make the length of each 6 1/2" long. If you prefer a longer top, simply add length. You can always trim off more at the end.

Now start sewing. Go ahead and sew up your Roscoe according to the instructions for steps 1 - 18. Now you should have a finished Roscoe from the chest up with a cropped bottom and raw sleeves.

Prepare your ruffle according to the instructions of steps 27 - 28.
This is a good time to try on your Roscoe and see if you need to adjust lengths. Holding or pinning the ruffle up to the cut line of your Roscoe, accounting for 1/2" seam allowance on both the ruffle and main Roscoe as well as 1/2" for the hem, and shorten if necessary. This is completely subjective. I kept mine quite short because I wanted that cropped look to wear with high waisted jeans, but feel free to leave it longer if you prefer it.
Once you are happy with the length and adjusted it as necessary, sew the gathered ruffle to the bottom of the main Roscoe as in steps 29 - 30 of the instructions. Also, hem the ruffle as in step 31 of the instructions.

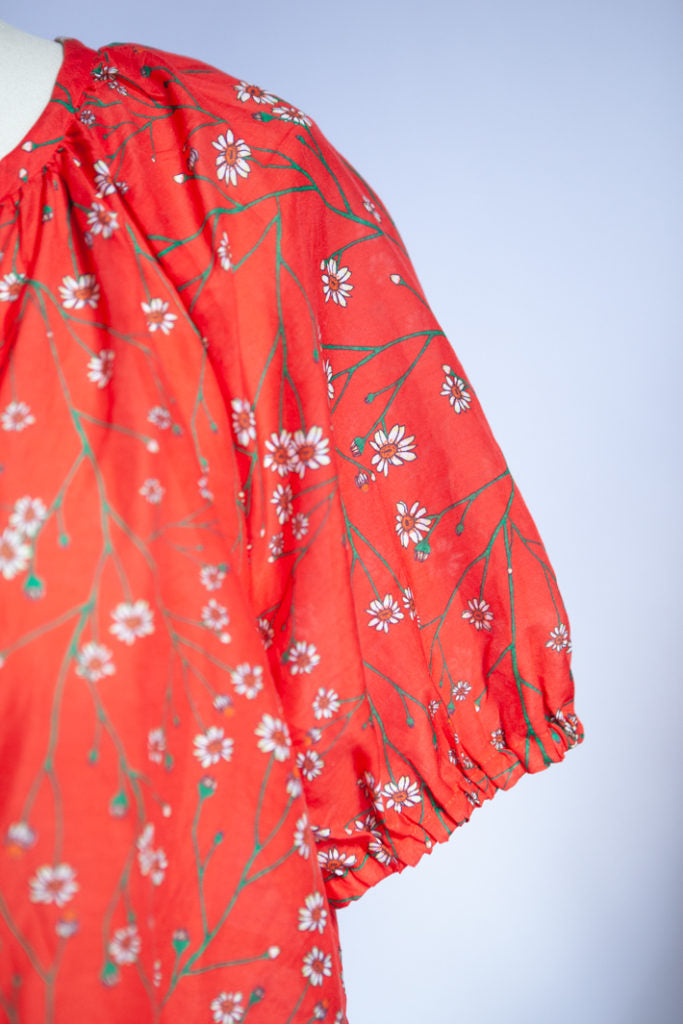
Now to address the sleeves. Try it on and see what you think about the length. Shorten if necessary, keeping the hem in mind. If you prefer to leave it without the puffed look you can simply fold / press the hem 1/4" twice and sew it.
If you want to sew the puffed look as shown above you will need some 3/8" elastic. Measure around your bicep so that the elastic fits without any tightness and add 1/2" for overlap. Cut two pieces of elastic that are this length and set aside.
Fold the bottom of your sleeve up by 1/4" and press. Fold again at 1/2" and press. Stitch the 1/2" hem leaving a 1" opening to insert the elastic. Insert your elastic. Overlap by 1/2" and stitch to secure. Stitch the elastic opening closed.
Give everything a good press and you should be good to go.

That is it! I love how mine turned out. This version was sewn up in some lightweight cotton / silk from The Fabric Store, and I think I need another one in some drapey crepe next.
If you need the Roscoe pattern you can get it in my shop in either a pdf or paper format. Please let me know if something in the tutorial is not clear. I'd be happy to clarify.