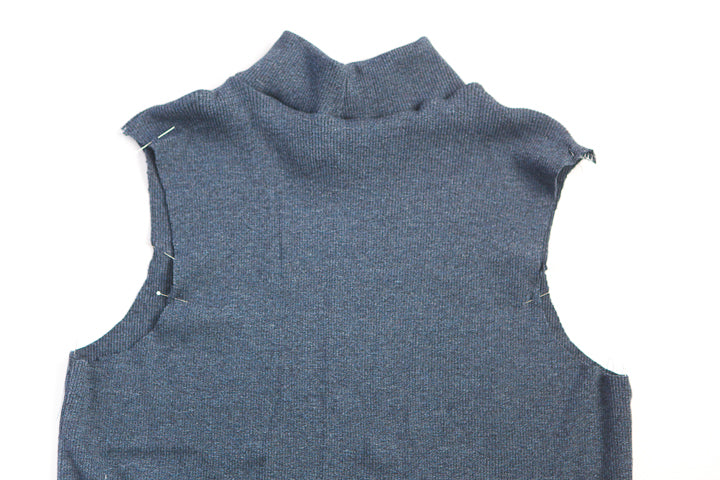
Step 7 - With right sides touching and matching notches, pin the front to the back at sides.

Sew side seams with a stretch stitch. For View A, sew from the armhole to the hem, backstitching at both ends.
For View C (shown), sew from the armhole to the large dot and backstitch. Make sure that you sew straight down to the dot and not follow the curve of the slit. It should look like this:

Press seam allowances open.
Note that for View C this step must be done on a sewing machine and not a serger to accomodate the slit. If using a serger, you may choose to finish the front and back edges separately and then sew the seam together with a stretch stitch on the sewing machine. Since knit fabric does not generally fray, I decided to not serge the edges in order to reduce any bulk.
Step 8 - You will notice that for the armhole facings, I am using a different fabric than my main dress fabric. If your fabric is a bit bulky like mine I recommend doing this as it will reduce any bulk in that area. You just have to be extra careful that none of your facing peeks out once you turn it under and stitch in the following steps.
With right sides touching, sew the short ends of the armhole facing together. Press seam allowances open if using a regular machine or to one side if using a serger.

With wrong sides touching, fold the armhole facing in half, aligning the long raw edges, and matching up the seam. Press.

Divide the armhole facing into quarters in the same manner as the neckband, placing pins at each quarter matchpoint.

Step 9 - Like you did for the neckline, divide the garment armhole into quarters, placing pins at each quarter matchpoint.

Step 10 - With right sides touching, pin the armhole facing to the garment armhole, bringing quarter matchpoints together. Add more pins if desired.

Sew the armhole seam using a stretch stitch or serger, stretching the armhole facing evenly between matchpoints to fit into the garment armhole as it is a bit smaller.

Step 11 - Turn your garment inside out. Pull the armhole facing to the inside of the garment. Pin and press so that the armhole seam is rolled slightly towards the inside of the garment to make it less visible on the right side. I like it to roll about 1/16" to the inside to make sure that you don't see it when right side out. This is especially important if your armhole facing is a different color like mine is.

Stitch along the fold of the facing to secure it to the garment using a stretch stitch. Press.
That is it for today! If you are sewing up the sleeveless top you are almost done. Come back tomorrow for the side seams and sleeves of Views B and D, and then on Thursday we will finish up the hems and side slits. In the meantime, let me know if you have any questions.


