I started this blog almost a year ago, so I thought that it would be fun to end the year doing something fun with some of the bloggers who have meant a lot to me over the last year. All of these ladies are amazing at what they do and inspire me.
What we did is we all made enough ornaments for all participating (nine in total). The ornaments had to be handmade and we are all posting our tutorials today. Then we send out the ornaments to one another so each get eight beautiful, handmade ornaments over the next few weeks. Fun right?
Here are all of the ladies participating (make sure to go and check out their tutorials today as well):
Sonja of http://gingermakes.wordpress.
Mika of http://savorystitches.
Suzanne of http://mybeaubaby.blogspot.
Miranda of http://www.
Megan of http://blog.megannielsen.com/
Jen of http://grainlinestudio.com/
Dixie of http://dixiediy.blogspot.com/
Madalynne of http://www.madalynne.com
Tutorial for my handmade peacoat ornament:

materials:
-square of felt
-matching thread
-sewing machine
-scissors
-handsewing needle
-black thread
-black seed beads
-fabric glue
-small piece of lining fabric
-copper wire
-pliers
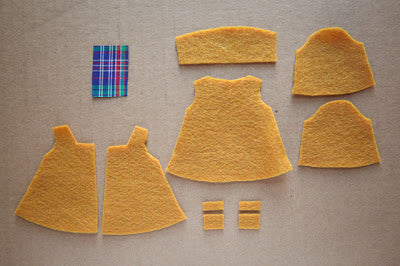
-pattern (click on the pattern photo below to enlarge and print it)

Step 1
Cut out your pattern.
Step 2
With right sides together sew shoulder seams.
*all seam allowances are 1/16"

Step 3
With right sides together sew the tops of the sleeve to the arm hole.

Step 4
With right sides together sew the sleeve and side seams up from wrist to hem.

Step5
Turn right side out and iron flat with steam.

Step 6
Tack the straight side of the collar piece to the back neck of the coat. (either by machine or hand stitch)

Step 7
Create collar by folding down the back over the seam, and bringing the top corners of the collar down to meet the angles of the pea coat. Use fabric glue to tack in place. (this may take a little working until it lays right)


Step 8
Take your lining fabric, fold down 1/4" and press. Open coat and glue into the inside so that it covers the neck seam.

Step 9
Glue on pocket pieces.

Step 10
Using thread and needle, sew on "buttons" (seed beads) on pockets and six to breast of coat.

Step11
Using pliers, form copper wire into a small hanger using my guide provided (or just make it up as you go:) Insert into coat and glue coat shut.


