So excited to get started today. Yesterday was admittedly a little boring with all of the prep stuff, but today we are doing some legit sewing. A lot of our bodice will be done by the end of this post. Let's get started.
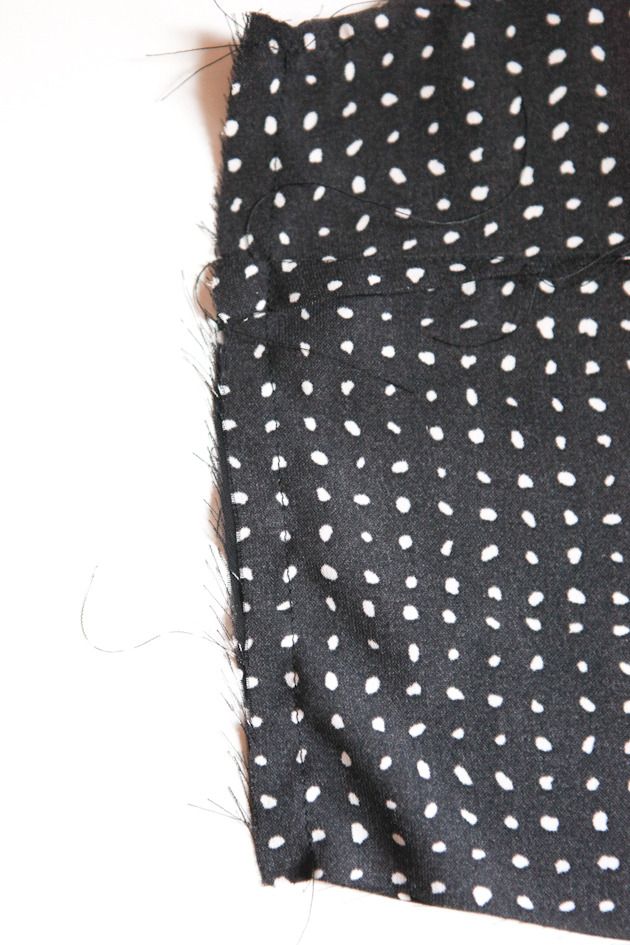
Step 3 - Sew darts on both front bodice pieces and press excess towards the waistline. Go ahead and pull out your tailors tacks at this time if you used them.

Inside view:

Right side view:
 Step 4
 - With right sides together, pin the front bodice pieces to the back at both the shoulder and the sideseams. Stitch.
This is a good time to do a little try on before we put on any bias tape or finish the seam allowances. Realize that the drawstring waist is attached to the skirt, not the bodice, so it may feel a little short waisted. If you are going to do any adjustments to the armholes or the neckline this is the last chance.


Finish the seam allowances on your side seams and your shoulder seams in your desired method. I chose to serge my edges. Press seams open or towards the back depending on your method of finishing your seam allowances.

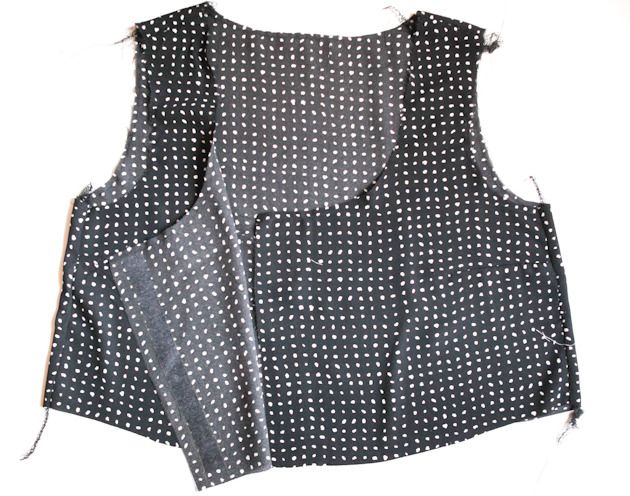
Your bodice should now look something like this!
 Step 5
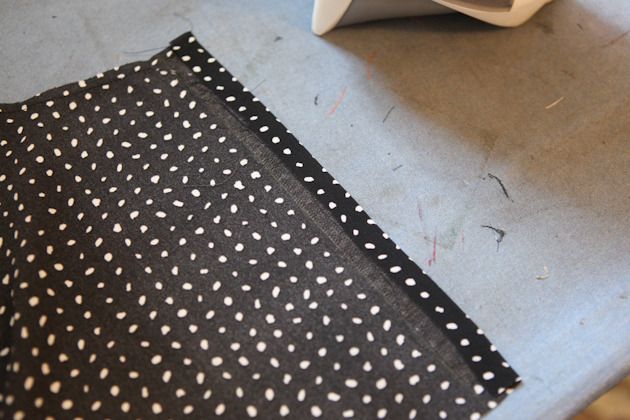
 - On each bodice front, fold along the first foldline (closest to the edge) with wrong sides together and press. (This is also right along the edge of the interfacing.)

Keeping this folded, fold again along the second fold line (which is also the other side of the interfacing), this time with right sides together. Press lightly with your finger or iron and pin at the top (neckline) edge.

Baste in place at a scant 1/4” from the top edge. (Basting is a long, temporary stitch used to hold pieces of fabric in place until the final stitching is done. Use your longest stitch length and do not backstitch.)
 Step 6
 - Take your bias tape and line the cut end up with one folded center edge of the bodice. Open one side of the bias tape and pin it, right sides together, along the edge of the neckline until you reach the other center folded edge of the bodice. Trim the bias tape so that it is flush with this fold. Stitch at 1/4” seam allowance. (You don't actually have to pin it all the way around first. You can just pin the first edge and then stitch around the neckline at 1/4", lining up the neckline and bias tape as you go. And then trim it at the end.) The bias tape will probably need to stretch a tiny bit as it goes around the curves and that is fine.


Your bodice will now look something like this:
 Step 7
 - Press the bias tape up and away from the bodice and over the seam allowance. (Tip - It’s best to press this on a curved surface such as a tailor’s ham or rolled up towel to support the curve of the neckline.) Steam is your friend here so don't be shy about it.

Understitch through the bias tape and seam allowance just inside of the bias tape. Understitching is a row of stitching used to keep the facing on the inside of a garment. It’s made by pressing the seam allowance towards the facing and then stitching close to the edge of the seam on the facing side, while catching the seam allowance underneath. This step is really helpful in keeping your bias facing on the inside of your garment and your neckline laying flat against your skin.

Your neckline should be looking something like this now.
 Step 8
 - On one of the center front edges, clip the corner within the seam allowance. This will just reduce a bit of bulk in the corner of your button band. Hold the edge of the first folded line (currently on the outside of the bodice) and flip it around to the inside of the bodice, turning the fold right side out and causing the binding to flip down.


Press the fold. Adjust the corner so that you have a nice point. Pin the button band in place.

Topstitch from top to bottom at a scant 3/4” from the edge, catching all layers underneath. You can also stitch this so that the wrong side is up if you are nervous about catching the edge of your folded buttonband. Repeat for the other side.

Here is a picture of what the inside of your buttonbands should look like.

And here is the right side.
 Step 9
 - Continue to turn the bias facing to the wrong side of the bodice while rolling the seam slightly to the inside (so that it is not visible on the right side of your garment). Using a curved surface such as a tailor’s ham, press and pin in place.

Starting and ending at the button band topstitching, edgestitch the open side of the bias facing to the neckline. I like to do this with the bias facing up (wrong side of the garment) so that I can see right where the edge of the bias facing is, but you can also stitch it from the right side of your bodice at about 3/8" if you feel confident.

Give it another press and it should look like this. So satisfying! I love a well sewn bias tape neckline. Notice that you cannot see any of the red tape on the right side of the bodice. That is your goal.

And here is a close up of the inside.

And here is a closeup of the right side.

That's it for today. Please let me know if you have any questions in the comments. Tomorrow we finish the bodice with the armholes and buttons / buttonholes.
 Inside view:
 Right side view:
 Step 4 - With right sides together, pin the front bodice pieces to the back at both the shoulder and the sideseams. Stitch.
This is a good time to do a little try on before we put on any bias tape or finish the seam allowances. Realize that the drawstring waist is attached to the skirt, not the bodice, so it may feel a little short waisted. If you are going to do any adjustments to the armholes or the neckline this is the last chance.

 Finish the seam allowances on your side seams and your shoulder seams in your desired method. I chose to serge my edges. Press seams open or towards the back depending on your method of finishing your seam allowances.
 Your bodice should now look something like this!
 Step 5 - On each bodice front, fold along the first foldline (closest to the edge) with wrong sides together and press. (This is also right along the edge of the interfacing.)
 Keeping this folded, fold again along the second fold line (which is also the other side of the interfacing), this time with right sides together. Press lightly with your finger or iron and pin at the top (neckline) edge.
 Baste in place at a scant 1/4” from the top edge. (Basting is a long, temporary stitch used to hold pieces of fabric in place until the final stitching is done. Use your longest stitch length and do not backstitch.)
 Step 6 - Take your bias tape and line the cut end up with one folded center edge of the bodice. Open one side of the bias tape and pin it, right sides together, along the edge of the neckline until you reach the other center folded edge of the bodice. Trim the bias tape so that it is flush with this fold. Stitch at 1/4” seam allowance. (You don't actually have to pin it all the way around first. You can just pin the first edge and then stitch around the neckline at 1/4", lining up the neckline and bias tape as you go. And then trim it at the end.) The bias tape will probably need to stretch a tiny bit as it goes around the curves and that is fine.

 Your bodice will now look something like this:
 Step 7 - Press the bias tape up and away from the bodice and over the seam allowance. (Tip - It’s best to press this on a curved surface such as a tailor’s ham or rolled up towel to support the curve of the neckline.) Steam is your friend here so don't be shy about it.
 Understitch through the bias tape and seam allowance just inside of the bias tape. Understitching is a row of stitching used to keep the facing on the inside of a garment. It’s made by pressing the seam allowance towards the facing and then stitching close to the edge of the seam on the facing side, while catching the seam allowance underneath. This step is really helpful in keeping your bias facing on the inside of your garment and your neckline laying flat against your skin.
 Your neckline should be looking something like this now.
 Step 8 - On one of the center front edges, clip the corner within the seam allowance. This will just reduce a bit of bulk in the corner of your button band. Hold the edge of the first folded line (currently on the outside of the bodice) and flip it around to the inside of the bodice, turning the fold right side out and causing the binding to flip down.

 Press the fold. Adjust the corner so that you have a nice point. Pin the button band in place.
 Topstitch from top to bottom at a scant 3/4” from the edge, catching all layers underneath. You can also stitch this so that the wrong side is up if you are nervous about catching the edge of your folded buttonband. Repeat for the other side.
 Here is a picture of what the inside of your buttonbands should look like.
 And here is the right side.
 Step 9 - Continue to turn the bias facing to the wrong side of the bodice while rolling the seam slightly to the inside (so that it is not visible on the right side of your garment). Using a curved surface such as a tailor’s ham, press and pin in place.
 Starting and ending at the button band topstitching, edgestitch the open side of the bias facing to the neckline. I like to do this with the bias facing up (wrong side of the garment) so that I can see right where the edge of the bias facing is, but you can also stitch it from the right side of your bodice at about 3/8" if you feel confident.
 Give it another press and it should look like this. So satisfying! I love a well sewn bias tape neckline. Notice that you cannot see any of the red tape on the right side of the bodice. That is your goal.
 And here is a close up of the inside.
 And here is a closeup of the right side.
 That's it for today. Please let me know if you have any questions in the comments. Tomorrow we finish the bodice with the armholes and buttons / buttonholes.

