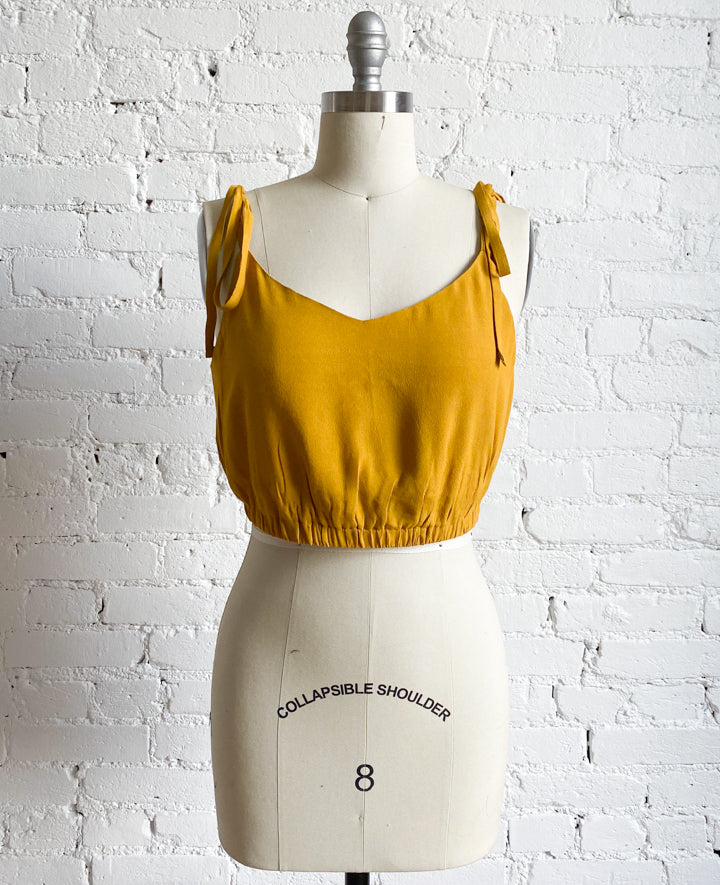
Welcome back to our third hack in the Ogden Month series. I am super excited about this one. Today I will show you how to make this tie shoulder / elastic waist blouse hack using the Ogden Cami pattern. Let's get started.
You will need your front, back and strap pattern pieces for this hack. You will use the front and back to create the linings as well so don't worry about the lining pattern pieces.
First let's talk straps. Since the straps will be tied a the shoulder, we will need 4 instead of 2 of them. We will also need to lengthen them quite a bit. As a starting point I decided to make my straps 3 x their normal length. This was pretty close in the end.

Next, let's work on the front. We want to shorten it since it will be ending at the natural waist instead of around the hip. I decided to take 3 inches off of the bottom as a starting point (we will take more off later once we try it on). Measure the 3" up from the hem to keep the shape the same.

We also need to straighten out the sides since we no longer need the extra width for the hips. Starting around the bust area, I drew a line straight down to the bottom and trimmed it off like below.

Now, repeat everything that you did for the front to the back pattern piece.

Cut out
- 2 fronts on fold (one for the main and one for the lining.
- 2 backs on fold (one for the main and one for the lining.
- 4 ties
Sew up your ties according to the instructions and set them aside.

Following the instructions for the Ogden cami, staystitch, sew each front to one back, and press. (You will have one main cami and one lining cami sewn up.)
On the main cami, pin one tie to each of the 4 strap points.

Following the Ogden instructions, sew the main and lining cami's together, attaching all four straps at the same time.

Turn the Ogden right side out, understitch, and give it all a good press.
Now to figure out the elastic casing. I am using 3/4" elastic for mine, but you can use whatever width you choose.
Put your Ogden on and tie the straps. Wrap your elastic around the natural waist (or wherever you want it to sit). Adjust your cami so that it has a small even amount of blousing above the elastic.

Using a marking tool, mark at the top of your elastic. It's much easier to get a friend to help with marking the back.

Once marked, take off your cami. Make sure that the lining is laying flat underneath and fold along the center fornt and center back. Smooth out your markings like below (top marked line).
Measure and mark another line below the first to be your cut line. This one accounts for the extra amount needed for your elastic casing. The amount will be your elastic width x 2 + 1/4" for space + 1/4" press under. For me that looked like 3/4" x 2 = 1.5" + 1/4" + 1/4" = 2".

Cut along the bottom line thru all layers.

Pull the main cami up and out of the way so you just have the lining extended. We are going to trim down the lining so it just tucks inside the casing by 1/4".

So for me, I marked and trimmed off 1 3/4" off of the lining.

Pull the main cami back down and make sure everything is flat and lining up. Turn it inside out. Press the main cami up by 1/4" wrong sides touching.

Press it up again by 7/8" (or your elastic width plus about 1/8"). It should cover the lining by about 1/4". Press and pin generously.

Edgestitch the casing closed, leaving a small 2 inch opening to insert the elastic.

Cut your elastic to a comfortable length (Don't make it too tight or it will ride up when you are wearing it.).
Insert the elastic thru the casing.

Overlap the ends and stitch the elastic to secure it.

Sew up the opening in the casing.

Trim loose threads and give it a good press. You are done!


