I finally made up another
Southport /
Hudson jumpsuit hack and took pictures along the way for a tutorial. I love this version even more than the first so I am excited to share it with you.

We are going to need to make a few adjustments to the pattern pieces so that they can connect up.
First, you need to adjust the
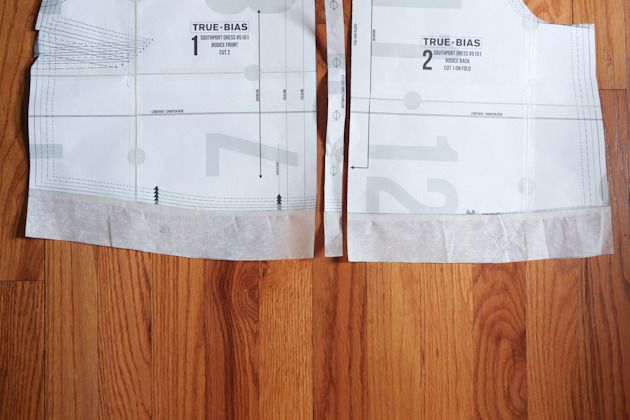
Southport bodice pieces in length. You will be able to take some of this off later on if you need to, so if you think that you have a long torso then I suggest that you add even more than I do. But, for my purposes, I added 2 inches of length to the front, back, and interfacing pieces.
The width of the bodice pieces need to be the same width as the waistband. If it is not really close you will want to adjust the width of the bodice a bit so that they line up once they are sewn together.

Now for the
Hudson pants. Because these are woven, and not knit as suggested in the pattern instructions, you will need to go up a couple of sizes (for reference my bodice is a size 8 and my bottoms are sized up to a size 12).
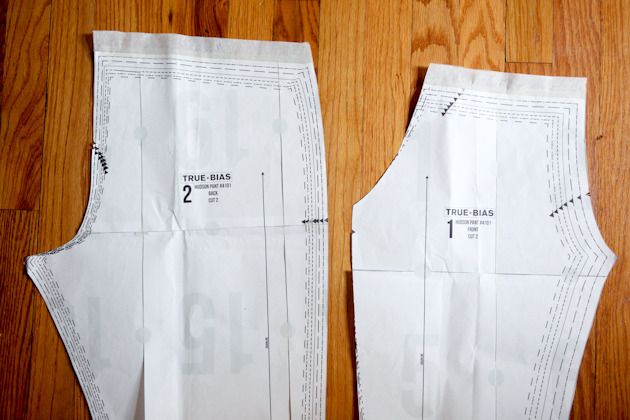
You also need to add a bit of height to the pants. Add one inch to the front and back Hudson pieces.

You also need to add and inch to the tops of both pocket pieces and an inch to the bottom of them as well.

Since you will not be adding the cuffs to your pants, you want to add some length to the bottom of your pattern pieces to compensate - about 2 inches. You also need to add some length for the hem. On this version I decided to add an elastic cuff so I added an extra 1 1/2" for that.
You also need to straighten out the sides a bit. Starting around the notches on the mid leg, gradually straighten out the bottom until it's perpindicular to the bottom.

You need to add a seam allowance to the top of the waistband so that you can attach the waistband to the Southport top. To do this add 3/4" to the top. Once this is folded in half it will be 3/8".

Now that everything is cut out, go ahead and sew up your bodice according to the instructions for the pattern. Do not sew up the buttons or buttonholes yet, as you may be making some adjustments to the length still.

Sew up the waistband according to the instructions on the Hudson pant pattern. Then, sew along the folded top of the waistband at 3/8" seam allowance. This will become the seam allowance to attach the bodice.

Now sew the rest of the pants according to the instructions, attaching the waistband.

With right sides touching, pin the bottom of the bodice to the top of the waistband.

Baste them together at 3/8" seam allowance.

Insert your elastic, but do not sew the two ends of the elastic together yet. Just pin them. Try it on at this point to check the fit. You may want to take a bit more length off of the bodice at this point. If you do, take out the elastic, unpick the basting, trim the top, and reattach.

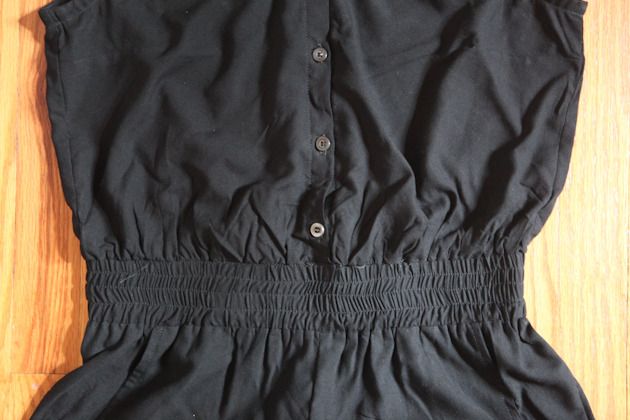
Once you are happy with the fit, sew up the rest of the waistband. I decided to omit the drawstring and added an extra row of stitching, but you can finish the waistband however you want. Also, add your buttons and buttonholes so that they are evenly spaced.

Lastly, you need to finish off the bottom of your jumpsuit. For my first version, I just turned it 1/4" and then another 1" for a simple hem. For this version I decided to add 1 1/4" elastic so I turned it 1/4" and then 1 3/8" and stitched a casing. Then I inserted the elastic and sewed it closed.

Now you just need to give it all a good press and you are done with your
Southport /
Hudson Jumpsuit. I have already worn mine to a picnic and loved it. So comfy but still trendy. I am a big fan and plan to transition it into fall.

Please let me know if you have any questions or if I left anything out.
 We are going to need to make a few adjustments to the pattern pieces so that they can connect up.
First, you need to adjust the Southport bodice pieces in length. You will be able to take some of this off later on if you need to, so if you think that you have a long torso then I suggest that you add even more than I do. But, for my purposes, I added 2 inches of length to the front, back, and interfacing pieces.
The width of the bodice pieces need to be the same width as the waistband. If it is not really close you will want to adjust the width of the bodice a bit so that they line up once they are sewn together.
 Now for the Hudson pants. Because these are woven, and not knit as suggested in the pattern instructions, you will need to go up a couple of sizes (for reference my bodice is a size 8 and my bottoms are sized up to a size 12).
You also need to add a bit of height to the pants. Add one inch to the front and back Hudson pieces.
 You also need to add and inch to the tops of both pocket pieces and an inch to the bottom of them as well.
 Since you will not be adding the cuffs to your pants, you want to add some length to the bottom of your pattern pieces to compensate - about 2 inches. You also need to add some length for the hem. On this version I decided to add an elastic cuff so I added an extra 1 1/2" for that.
You also need to straighten out the sides a bit. Starting around the notches on the mid leg, gradually straighten out the bottom until it's perpindicular to the bottom.
 You need to add a seam allowance to the top of the waistband so that you can attach the waistband to the Southport top. To do this add 3/4" to the top. Once this is folded in half it will be 3/8".
 Now that everything is cut out, go ahead and sew up your bodice according to the instructions for the pattern. Do not sew up the buttons or buttonholes yet, as you may be making some adjustments to the length still.
 Sew up the waistband according to the instructions on the Hudson pant pattern. Then, sew along the folded top of the waistband at 3/8" seam allowance. This will become the seam allowance to attach the bodice.
 Now sew the rest of the pants according to the instructions, attaching the waistband.
 With right sides touching, pin the bottom of the bodice to the top of the waistband.
 Baste them together at 3/8" seam allowance.
 Insert your elastic, but do not sew the two ends of the elastic together yet. Just pin them. Try it on at this point to check the fit. You may want to take a bit more length off of the bodice at this point. If you do, take out the elastic, unpick the basting, trim the top, and reattach.
 Once you are happy with the fit, sew up the rest of the waistband. I decided to omit the drawstring and added an extra row of stitching, but you can finish the waistband however you want. Also, add your buttons and buttonholes so that they are evenly spaced.
 Lastly, you need to finish off the bottom of your jumpsuit. For my first version, I just turned it 1/4" and then another 1" for a simple hem. For this version I decided to add 1 1/4" elastic so I turned it 1/4" and then 1 3/8" and stitched a casing. Then I inserted the elastic and sewed it closed.
 Now you just need to give it all a good press and you are done with your Southport / Hudson Jumpsuit. I have already worn mine to a picnic and loved it. So comfy but still trendy. I am a big fan and plan to transition it into fall.
 Please let me know if you have any questions or if I left anything out.

